Whether you’re keeping the kids busy in Dubai or you’re away on hols, get the little ones to make a nature journal – a kind of scrap book of all the things they can find outdoors. From bird feathers to little drawings, cut-outs from magazines to pressed flowers – this is a great way of connecting with the world outside when they’re confined to the indoors as temperatures soar and a fabulous way to help develop their understanding of the environment around them, wherever you may be.
Please welcome crafty mama Pooja Makhijani with a 3-part series on DIY bookmaking projects you can do with your little ones!
I first learned basic bookbinding at the Center for the Book Arts in Chelsea, New York City, and continued my studies as a creative writing graduate student in the U.S. I have taught the book arts in a variety of educational, corporate, and community settings since 2011. I’ve worked with children and senior citizens, and I relish the challenge of sharing my love of this quirky art with those who may not have the access or the means to procure expensive tools and materials.
I have recently begun encouraging my daughter to use this nature journal to document (in drawings and collages of found objects) her observations of the flora and fauna in our neighbourhood. For budding naturalists it’s perfect for a trip to the Dubai Miracle Garden or the coral at the aquarium, but it works just as well with the flowers growing along the street!
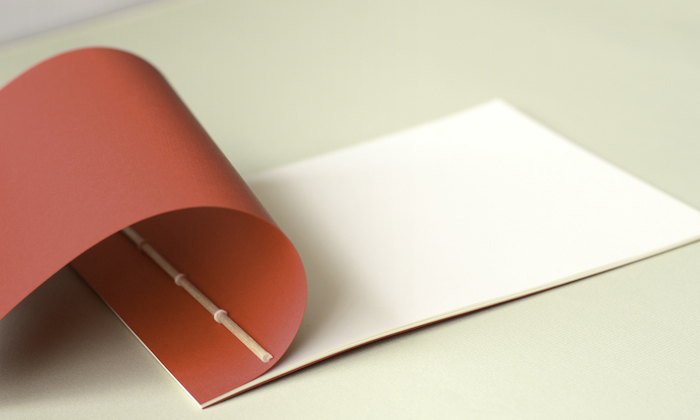
In this binding, the body of the book is a stack of single sheets. This structure is attributed to Hedi Kyle, an American book artist.
Tools
- A bookbinding needle (a strong, blunt-tip needle)
- A student quality (non-professional quality) binder’s awl, a tool used for piercing sewing stations, or the hole through which the needle and thread can pass
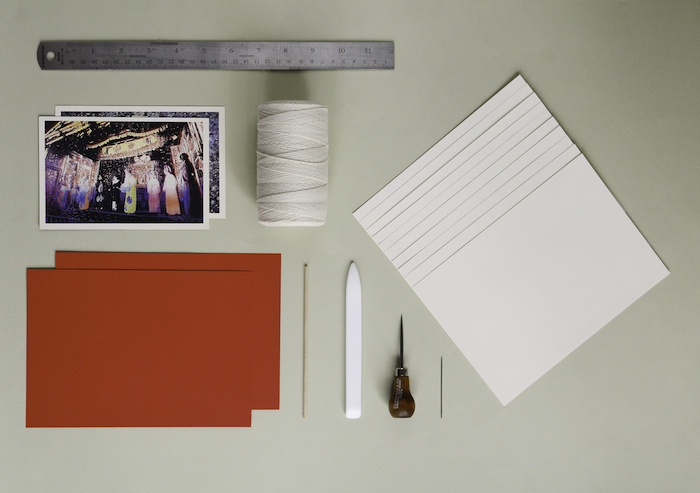
Materials
- 2 sheets 4 ¼” x 5 ½” paper for cover
- 10 sheets 4 ¼” x 5 ½” for pages
- One 5 ¼” dowel, skewer, or branch
- Unbleached French linen thread (pictured) or six-ply cotton embroidery floss
Method
 1. Stack the papers evenly.
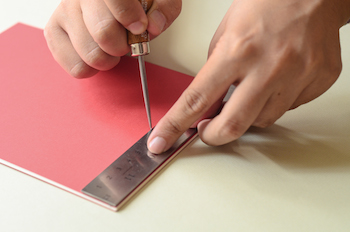 2. Using your ruler and a pencil, mark three sewing stations, or holes. Station 2 is exactly in the center of the spine, 1” from the edge. Stations 1 and 3 are equidistant from the center and one inch from the edge. (I marked them 1.5″ from Station 2.)
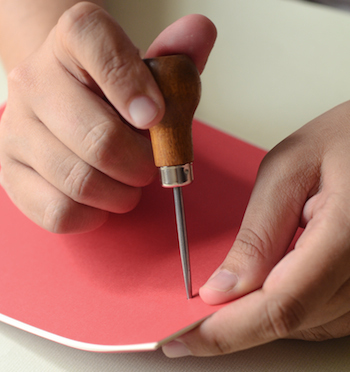 3. Using your awl, pierce the sewing stations.
4. Thread your needle. Do not tie a knot just yet!
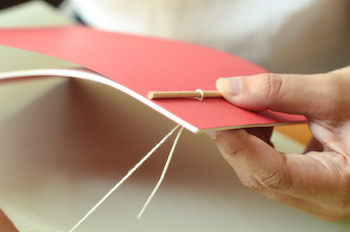 5. To bind, begin at the back at Station 1. Position your dowel along the stations. Pull your needle through Station 1. Pull all but 2″ of the thread to the front, over the dowel, and back through Station 1.
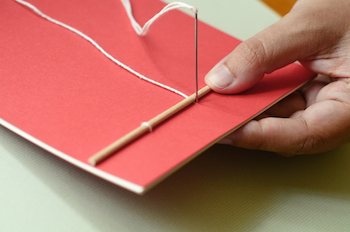 6. Pull your needle through Station 2, over the dowel, and back through Station 2.
 7. Pull your needle through Station 3, over the dowel, and back through Station 3.
 8. Tie a square knot at the back.
Now you’re ready to explore!